Thursday, September 13, 2018

Using Angular in Siebel Open UI Framework - Angular Todo App in Siebel

About: This post is about using Angular Libraries with Siebel Open UI Framework. The obvious advantages of bringing in Angular with Siebel are :
  1. It Provides a good MVC structure as compared to using only Jquery.
  2. It is intuitive, comprehensive and timesaving.
  3. Provides a better control of data as the data binding is easier.
  4. It will open up the possibilities of having small Angular Apps integrated with Siebel Application. For example Todo List on HomeScreen, Weather Updates, Interactive Dashboards etc..
As part of this post, We will discuss how to develop a Todo List on Siebel HomePage using Angular. In this post, We will only discuss Angular 1 as I am new on Angular and still experimenting with this framework.

The Idea of using Angular with Siebel came to me while I was working on the development of Siebel IPAD application and I had to write more than 20,000 lines of PR code to implement some UI/UX and functional requirements. I discussed this with our UI/UX designer if We can bring in some 3rd Party library with Siebel Open UI and We realized that it was possible. I was able to find some awesome tutorials by Duncan Ford to include 3rd Party libraries or Jquery Plugins with our PM/PR but unfortunately just doing this will not work in case of Angular. You can Check out the below video to get an idea:


While implementing angular using this technique I was unable to bind the angular app with the library. However, I observed one strange thing that my Angular structure was working fine if I include Angular URL from Google CDN. But if I include the locally hosted Angular.js file the App was not behaving as expected. It took me some time and some help from Angular experts (my Sister :p ) to realize that there was more to it. We will discuss this implementation with the help of two examples. First We will develop a small sample Angular Dom and make it work with Siebel, and then We will discuss how to develop a Todo List using Angular JS.

Using Angular in Siebel:

The first thing that We need to start with it is to get the Angular Library downloaded to our Siebel Public folder for local hosting. We can definitely use the CDN libraries hosted by Google or Microsoft but these won't work on intranet network especially where users don't have access to the public internet.

Resources Needed:
Note: After you download the PR and controller do check the comments in the code. As it will give you an idea how this whole thing is working.

Steps:

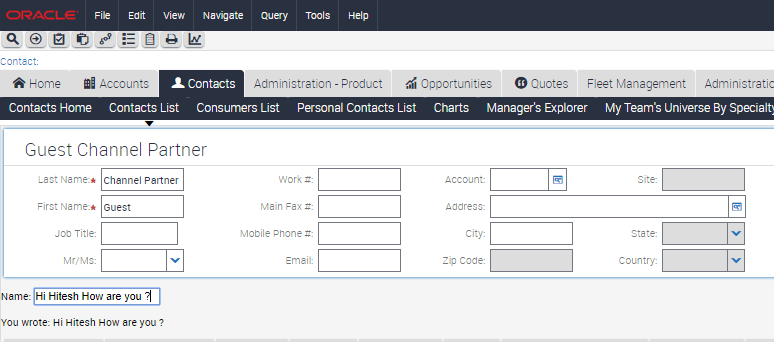
1. We will build a small Angular Dom or HTML content like below:
<div ng-app="">
<p>Input something in the input box:</p>
<p>Name : <input type="text" ng-model="name" placeholder="Enter name here"></p>
<h1>Hello {{name}}</h1>
</div>
Refer W3School Tutorial link provided above

2. We need a Physical Renderer on an Applet (angularDemoPR.js already provided) where We will use his DOM to append or replace it with the Applet DOM. The code to do that will be written after the ShowUI event of PR. The PR given in the link is for Contact Form Applet.

3. Once We are ready with this We will have to write a controller (ngDemoController.js already provided in the above links) which is to be loaded with the Angular DOM to be attached with our Siebel Page. This is an important part as it binds the Angular DOM with the library and without this, the Application won't work if Angular is hosted locally. 

4. Register the PR on Manifest Administration Screen.


5. Log out of the application and Logn in, Navigate to the applet which is associated with the PR. Start typing in the input box and the content will appear below it in real time.


Sample Angular Application - Todo List on Siebel Home Page:

Now since We know how to use Angular in Siebel. We will develop a small app to manage Todo List on Siebel Home Screen. This is an Angular Application to show, add, delete today's Tasks of Logged In User on Homepage as ToDo List Reminder. The Application queries, add and deletes today's Activities using Siebel Business Service and Workflows.

Resources:
Now once We have all the resources We have to place these files in public Folder Structure and register it in Siebel Manifest Screens to allow it to load with the Applet. Check the Snapshots below to get an idea.


Once We are done with the setup We have to log out and re Login to view the changes. The snapshot below shows how the Todo list will appear on Siebel HomePage. 


The video below will show you the navigation journey and usage of this small Angular App with Siebel on an Android Device. Enjoy the video and do let me know if you have implemented or have ideas to develop such Angular apps for your Siebel Application.


Thanks for reading the post. If this post helps you in any way Do comment below and let me know how it helped you.

Saturday, September 1, 2018

Broadcasting Messages to Siebel Application Visitors

About: This post will take us through some tips and tricks to broadcast administrative or informational message on Siebel Application. We will see how We can call Javascript functions on Siebel Web Templates and load messages and display it on the Login Page from a file without caching it so that the user is not forced to clear cache every time he returns to the Siebel Page.

Sometime back I was asked to Broadcast a message to all the Siebel users on Production Server that the Siebel Application will be down for maintenance during the Weekend. Many of us might be aware that Siebel provides a Vanilla Screen for Broadcasting a Message to the users where We just have to enter a Broadcast message and We are all set. The client went a step ahead and asked us if We can display a similar message on the Login Page and since it was Production Server We were not allowed to bounce it before the maintenance schedule. At that time the only idea We had was to display the text on the Login Web Template or via Splash Text on CFG but that change won't take effect unless the Siebel & Web Servers are bounced (I believe there might be ways of doing it from Siebel Server Parameters on Client as well do let us know in comments if any of you has any idea or knows some other way). So to address this problem We came up with a solution in the further releases. The solution involved maintaining the Broadcast/Welcome Message on a text file which We read from a javascript and We called the JavaScript function from the Login Page.

I will detail the solution in steps for a better understanding:

1. We will create a folder in Siebel Custom Scripts where We will maintain a Plain Text file BroadCastMsg.txt and a javascript file BroadCastMsg.js.
Public Folder Path


  • The Plain Text file will contain the Broadcast Message in HTML format. We may keep it in a simple text, the reason I chose to keep it in HTML format was that it will give me the flexibility to define the styling of the text without any other change. Contents of the File are as below: 
<Marquee><p style='background-color:black'><font color='yellow'>Dear User, The Website will be down for maintenance on Sunday from 6 p.m. to 10 p.m. - Siebel Administrator</font></p></Marquee>


Dear User, The Website will be down for maintenance on Sunday from 6 p.m. to 10 p.m. - Siebel Administrator

https://drive.google.com/file/d/1GHimWoXqoiD_4tmEaXoQg4L6xlk_ETQp/view?usp=sharing

Note: Marquee is used to produce a ticker effect. Marquee is a deprecated HTML tag, we can use JS and CSS customizations to display the same effects. We have used it here to avoid coding and since it is still recognized by almost all browsers hence it will work. 
  • The Javascript File contains a small function to read the contents of the file. The function uses ajax call to read the file without caching the contents so that everytime the user returns to the login screen they see the latest Broadcast message without clearing the Browser cache. Snippets Below:
function initBM(){
try
{
$.ajax({
url:'23044/scripts/siebel/custom/BroadCastMsg/BroadCastMsg.txt',
cache: false,
success: function (data){
$("#broadMsg").html(data);
}
  });
}
catch(e)
{
console.log(e);
}
}


2. After We have all these resources We need a space in Login Web Page where We will display the Broadcast Content. For this, We will create an empty <div> in our Login Page and add some lines in the header of Login Template to include the Javascript file, jquery libraries and Text file we created in first step so that it loads with the Login Page. We have to include the jquery libraries as our javascript has Jquery methods which won't work without including the library.

Add the below lines to the header : 

<!-- Files for Broadcast message - Hitesh Dhanwani -->
<link href="siebel/custom/BroadCastMsg/BroadCastMsg.txt" rel="text/plain">
<link href="files/custom/BroadCastMsg.css" rel="stylesheet">  
<swe:include-script file="3rdParty/jquery.js"/>
<swe:include-script file="siebel/custom/BroadCastMsg/BroadCastMsg.js"/>
<!-- END Files for Broadcast message-->

Add the below Div to the body:

<!--Div Container for BroadCast Msg - Hitesh Dhanwani -->
  <div id="broadMsg"> 
</div>
<!--END Div Container for BroadCast Msg-->

SWELogin.swt:

3. Replace the Files on Server, bounce the Web Server and Siebel Server and We are done.

Now We have a file Where Administrators can enter any message and will display to the users on the Login Screen. On one window I have the BroadCastMsg.txt file opened and on the other, the Login Page and We will be able to see the same message on the Login page The Video demonstrates how.


Do comment below if this post helps you in any way or if you know or have implemented a similar functionality in a different way.


Monday, August 27, 2018

The Postload/Preload Event and Getting Siebel User's Device/Browser Info to Load Mobile UI


About: This write-up will focus on the different ways We can exploit the Postload and Preload event of Siebel to do some amazing stuff. As an example, This blog will focus on how to identify the Clients Browsing Platform and load UI contents accordingly.

Many Times We fall into situations where We want to modify our Web contents on the basis of Clients Browsing Platform and We may have a similar requirement for a Siebel Application. And If that's what you are looking for this post is just for you.

There are certain vanilla JavaScript events which are just called before and after a Siebel Page loads. The events are OnPostLoad(refer postload.js) and OnPreLoad(refer preload.js). We can extend these events as per our needs and requirements. For example, We want to identify the Browser and the device being used by the user and if its a Desktop We'll just let them browse the application but if its a mobile device We may want to load the mobile version of Siebel. Here I am working on custom mobile views and HTML is still in development so We will just inform the user that it's under development in an interactive way.
Let's do this in steps :

1. Navigate to Siebel Client Public Folder to the Postload.js File


Snapshot of Public Folder
Extra Gyan : 23044 is a release number. This number is used by the Siebel Community to version control JavaScripts for Siebel Product and as We know ENU is the Language Code for Siebel.

2. In the Postload File, We will add the code to Detect Browser and Device Information. There are certain Browser Commands We can use to get device information. Some of the commands We will be using here are navigator.userAgent, navigator.platform, navigator.appVersion, navigator.vendor .To test this We can just type these commands on our browser console and see what values We get. We can just type 'Navigator' and see the details We can get about a device. 

3. We will add our logic to handle different scenarios. Refer snippet :

    function OnPostload( ){
    try{
var deviceInfo = navigator.userAgent;
var mobCheck = theApplication().GetProfileAttr("mobcheck");
if((deviceInfo.includes("Android") || deviceInfo.includes("Ipad") || deviceInfo.includes("Iphone")) && mobCheck != "Y")
{
theApplication().SetProfileAttr("mobCheck","Y");
alert("Mobile Platform Detected /n The mobile version of the Website will load");
//our logic
}
    }
    catch(error)
    {
        console.log("Error Occurred while loading Mobile Website");
    }
    }
}

4. Save The Changes Clear Cache and replace the file on the server or on a local client.

The Below Video gives a glimpse of one of the ways We can use this JS to customize our application.


You can get the code for this in the link below :) .
https://drive.google.com/file/d/16qAGMQ5lu6l_lMavMZEF8yaI-UN0P9a1/view?usp=sharing

The code for HTML game has been taken  from SoloLearn.

Thanks for going through the post. Like, Comment and Share if you liked the content. Do let me know the way you will be or have exploited this JS to customize your Siebel App.

Sunday, May 1, 2016

Siebel Integration With Apache SVN


About:

This. Post contains details. On how to use Apache SubVersion (SVN) with Siebel and enable version control for Siebel SIFs or other static files like Javascripts and CSS used for Open UI customizations. In past I have used this version controlled strategy with three of my clients and it was really helpful in tracking the changes and reverting in case Anything goes wrong. 

For the clients who didnt use this tool I just installed the server and client on my machine and used it to track my own changes so that I could revert back to old versions anytime I wanted. 

Extra Gyan: One of the additional benefits that SVN gave me with such clients was File sharing. If I wanted to share any files with my colleagues I would just upload the file in repository and share the URL with them. 

So if your looking for some help with Siebel and SVN Go through the post. In the end share, like,  follow and tell us your experiences with SVN or. Any other Versioning Tool in the comments section. 

Version Control:

An important element of the modern software development process is source control (or version control). Cooperating developers commit their changes incrementally to a common source repository, which allows them to collaborate on code without resorting to crude file-sharing techniques (shared drives, email).

Source control tools track all prior versions of all files, allowing developers to "time travel" backward and forward in their software to determine when and where bugs are introduced. These tools also identify conflicting simultaneous modifications made by two (poorly-communicating) team members, forcing them to work out the correct solution (rather than blindly overwriting one or the other original submission). Here we will be dealing with version control of Siebel Objects (SIFs).

Setup:

SVN is a Server Client Utility We need to have a Server runing to use SVN Repositories

To use SVN in existing environment we need to do the following installations:
  1. Install ‘VisualSVN Server Manager’. - Server Side. 
  2. TortoiseSVN Client - Developer's Machine.  
Installing SVN Server Manager:

To get started with VisualSVN Server We need to download the installation package run the installer and follow the installation wizard steps.

The installation process is quite easy:
·               Examine and accept the End-User License Agreement.
·               Choose to install both VisualSVN Server and Management Console.
·               Click the Next button.


 Then we will come to the Custom Setup page where we need to choose general server settings such as installation folder, basic network settings and authentication options. All of these options are briefly described below.

On the initial server configuration screen we need to choose the following VisualSVN Server option.
·  Location: This option specifies the folder to which VisualSVN Server will be installed. It's recommended to keep this option unchanged.
·    Repositories: This option specifies the folder where repositories will be stored. To prevent possible installation failures, it's recommended to leave this option with the default value. Later we can adjust this option in the VisualSVN Server Manager.
·    Server Port: This option specifies the TCP/IP port that will be used by VisualSVN Server. Switch to an alternative value if the default port is already occupied by other services such as IIS. Later we can bind VisualSVN Server to specific network interface in the VisualSVN Server Manager.
·  Use secure connection: VisualSVN Server supports secure connection over the HTTPS protocol. It's recommended to keep this option unchanged.
·  Authentication: VisualSVN Server supports Subversion and Windows authentication schemas. Subversion authentication relies on the internal users list maintained by VisualSVN Server while Windows authentication relies on Active Directory credentials. It's recommended to use Windows authentication. Later you can enable Integrated Windows Authentication method in the VisualSVN Server Manager.

Installing TortoiseSVN Client: - Developer's Setup

To install the latest version of TortoiseSVN client we need to download the installation package http://tortoisesvn.net/downloads.html run the installer and follow the installation wizard Steps.

This is also a very easy process and make sure that you also install the command line version of tortoise SVN.
 Run the installable file for TortoiseSVN.

Click on the “command line client tools” which is crossed as shown below and select “Entire feature will be installed on local hard drive” option and click on Next to install the command line for SVN.

Once the installation is complete we are ready to use the TortoiseSVN client to fetch repositories from the SVN server.

Repository:

SVN repository helps us keep track of a collection of files and folders. Any time we change, add or delete a file or folder that we manage with Subversion, we commit these changes to our Subversion repository, which creates a new revision in our repository reflecting these changes. These repositories are created by the admin on the server to control versioning of files. A developer will create a local SVN repository where the developer will work and on completion will commit the changes into the SVN server Repository.

Creating a SVN server Repository

To create a Server repository go to the SVN Server Manager installed on the Server and perform the following steps:

Right click on Repository and select the option to create a new repository.

Select Regular FSFS Repository.
  
 
Give Your repository a name (Make sure you don’t give any space in your repository name).
Select the type of Repository you want to create (Single-Project Repository is preferred for version control of static files as it consists of tags and branches which are very useful for parallel working).


Click on Next and follow the Wizard to create the Repository. Once you are done you will see a repository created in Your SVN Server Manager

Creating User Access:

To access any SVN Repository we require Login Credentials on our SVN URL. This ensures that only authenticated users have access to read/write the files in repositories. End users for this will be theDevelopers who are required to work on the Files for modification and addition of the functionality to our Siebel Application. To create user access for the Developers so that they can access the SVN repositories we will perform the below Steps:

a)      Go to SVN Server Manager installed on the server
b)      Click on User Folder.
c)      Right Click and Select New User option.
d)     d. Enter The Credentials for the new user and click on ‘OK’ . A new User will be created.

Besides Creating a new user for SVN we can Also group the users using the grouping feature which will enable us to provide access to specific repositories for specific users.

Now developers have access to repository on our SVN Server manager which will have the Files for version control.

Creating a Local SVN Repository:

A local SVN Repository is a copy of SVN repository into the Developer’s local machine. Developer makes changes into the local copies and after completion commits the modified files into the SVN Server Repository so that the change is reflected into the final version of the files. To create a Local SVN Repository We need to perform the following steps:
a)      Create a Local folder in local machine and make sure that we have right access to this folder.
b)      Right Click -> SVN checkout.
c)      Enter The URL of the repository and select ‘OK’.
d)     On clicking on ‘OK’ Client will ask for SVN credentials. Put in the SVN credentials provided by the admin.
e)      On authentication the TortoiseSVN Client will fetch the full folder structure from The SVN Server Repository.


Using SVN in a Web Browser

The SVN repositories can also be accessed via a Web browser. These SVN files are shared on a common server hosted by SVN Server Manager. To access the SVN repository on a browser we simply need to put the URL in a browser and provide the SVN credentials. On successful authentication we can access the SVN repository.
Developers can read and download the SVN files using this SVN URL and can navigate through SVN repository.

Integration with Siebel Repository:

Using version control has become the default position in Programming world, and with good reason.Code checked into version control doesn’t get lost, the entire history of the code is available for viewing, and we can tell exactly who has made changes what and it allows for parallel development.

In Siebel environment the Siebel repository is the code. Version control is just a way to track changes made. The Siebel Repository (.srf) is a non-static file and hence it becomes impossible to do version controlling for SRFs. However we can version control the individual SIFs (i.e. the archived version of the Individual Siebel Objects). Integrating Siebel Repository with SVN to version control our SIFs allows us to enjoy certain benefits of SVN. It give us the ability to:
a)      Track the Changes done to individual objects (SIFs), and who changed it.
b)      Find out why they changed it.
                                          
Following are the steps illustrated to integrate Siebel with SVN:

1.  SETUP

Step 1:- Create a Development folder in local under C drive with the structure as shown below to store the SIF files.

C:\SVN_REPOSITORY_LOCAL\Objects

Note: - The Folders created should have read\write access.

Step 2:- Rename the srcctrl.bat file (like srcctrl_original.bat) present in …tools\bin folder. Copy the srcctrl.txt file from the Artefacts section and save it as srcctrl.bat in …tools\bin folder.

Step 3:- Configuring the source control batch file (srcctrl.bat)

Edit the source control file available in …tools\bin folder with notepad and change the following properties under User defined parameters.

Ø   SVN_URL:- Mention the SVN URL till the parent folder i.e. one folder above which the objects are added.
Ø   SRC_USR:- Mention SVN username used for login into SVN here. e.g.:- set SRC_USR=<SVN Username>
Ø   SRC_PSWD:- Mention SVN password used for login into SVN here. e.g.:- set SRC_USR=<SVN Password>

Step 4:- Configuring Siebel to use version control.

·         Open Siebel Tools and go to View->Options->Check In/Out.
·         Check the Option “Enable source control integration”.
·         Select the srcctrl.bat file from the browse option to add Integration batch file.
·         Make sure that Siebel Tools Server and Client Data source are configured correctly for checkout and check-in.


 Contents of SRCCTRL.bat

Using Angular in Siebel Open UI Framework - Angular Todo App in Siebel

About: This post is about using Angular Libraries with Siebel Open UI Framework. The obvious advantages of bringing in Angular with Siebel...